Showing posts with label Sewing. Show all posts

December 2, 2011

Baby Girl Quilt

We just welcomed a new niece to the family so I decided to make a cute but super simple quilt.  With my brother's first kid they didn't know for sure if she was going to be a girl or not so everything they got was greens and yellows.  This time they knew for sure so I was able to go with bright, girly colors.  
 I followed The Road Trip Quilt tutorial from Cluck Cluck Sew.  I did add two more fabrics to my quilt to make it a little longer.  Instead of having 1/4 yard of 10 different fabrics, I used 1/4 yard of 12 different fabrics.  

After I had pieced the top of my quilt, I used a quilt frame to put the three layers together.  I find that using the frame helps keep my fabric from getting bunched when I pin the three layers together.  
 I used two yards of fabric for the back that also worked as my binding.  I used the Back to Front Binding method.  Here is a Back to Front Binding tutorial by Prudent Baby that I found that is close to how I did mine.  
I also used a walking foot to machine quilt the blanket.  I did one line down the seam and 1/4 inch on each side of the seam.  

I also did a boy version of this quilt for my new nephew.  Unfortunately, I didn't get pictures because my camera was in the land of the lost (aka a secret hidden pocket in my purse!)

November 15, 2011

Double Sided Nursing Cover

A friend of mine is having her 5th baby in a few days and never had a nursing cover.  I couldn't let the misfortune to go on any longer! 
I think having the double layers helps the peep hole stay open while nursing.  I also like having pockets on the inside to store pacifiers, nursing pads or burp cloths.  
Made by the Mamamonster has a great tutorial that I follow every time I make a nursing cover.  It is only one sided so I also use Our Side Notes tutorial for the double sided and pockets.  Someday I'll make my own combining the two!

I found the fabric at JoAnns.

Scrap Belt & Applique Shirt

My niece just turned three.  Since I don't have a girl to dress up in pink, I take advantage of every birthday and Christmas that comes around.
   This year I made her a cute applique bird shirt.  I used scraps from my stash and made my own bird pattern on cardboard before cutting out the fabric.  I found the cute lettuce edged shirt at Walmart.
I thought it added a lot of character to have the wing from the bird not completely attached.

I also made a Scrap Pieced Belt from the tutorial by Ashley at Make It and Love It.  Go HERE for the tutorial.  Super simple and I had everything in my stash.

May 25, 2011

Sewing Machine Pin Cushion

Whenever I sew I usually end up with a few pins still in my tomato pin cushion, which I usually lose, and several all over the table and even more on the floor.  I found a great idea to make a pin cushion that I tie around my machine.   
I just stick my pins in after I pull them out of my project instead of digging for my tomato cushion or just leaving them on the table.  
One of my most loves and used projects.  Plus, it is so much cuter that these...
I got the idea a couple years ago from I Can Find The Time. 

May 8, 2011

Nursing Strap

My sister-in-law just recently had her fourth child and has never had any kind of nursing cover.  She didn't want to cart around a nursing cover that was bulky so I came up with making a strap that attaches to any blanket that she has on hand.
I got the idea from winning this Cover Me Strap from a giveaway blog.  
cbcm
To help me create my own version, I used part of the nursing cover tutorial from Sew Much Ado.  
 I attached two of the ends to mitten clips that I purchased from JoAnns.  
 I followed the tutorial on attaching the d-rings to make the strap is adjustable.  
Next time I don't think I'll make it as thick as the tutorial shows.  The tutorial cuts the straps out at 4.25'' but next time I'll cut it at 3''.  By cutting it thinner it will fit better in the mitten clips and the d-rings.  I'll also make it a little shorter.  I think a length of 18'' instead of 26'' would be more than long enough for this strap.


Mondays
Making The Girl Creative 
  

Tuesdays

Craft Link parties
 all crafts Handmade Projects & Parties ~ Add Yours! Running With Glitter

Wednesdays
BLOG TITLE NightOwlCrafting 

Thursdays
HookingupwithHoH  

Weekends
 Photobucket 

November 15, 2010

Toddler Jean Skirts

My adorable little niece, Allie, just turned 2 years old the other day so I whipped up a couple skirts for her.  I started by finding these perfectly girly pair of pants with pockets that have bows and little flowers and slits at the bottom.  The best thing about these particular pants is that they didn't have a zipper which helped a lot when I was turning it into a skirt.  
 I did make the mistake of cutting the pants too long.  Luckily, they are a size too big, so hopefully, my little niece will be able to grow into it more when she gets a little older.
I decided to leave a little slit in the back which allows a little more movement when walking.  It also helps it flare out a little more too.  I used parts of the tutorial found at Crap I've Made to attach the fabric onto the bottom of the skirt.  
I took what remained of the bottom of the pants and turned them into another skirt.  Since I had cut the other skirt too long, this skirt was way to short.  It will have to be worn with tights or stretch pants.  For the top I just used white knit fabric.  I used parts of a tutorial found at A Jennuine Life for this skirt.
I wasn't originally planning on making the bottom of the pants into a skirt but I couldn't pass up the little flowers, bows, and the slit.  

November 2, 2010

Sir Alexander

This year we chose to make my son into a Knight!  He pretty much hated the costume until we were outside getting candy.  Don't you love the look of glee on his face?
 For his bag I just sewed up a simple bag (tutorials all over the internet) with some fabric from my stash and then just attached a dollar store shield to the outside.  For the rest of the costume I used the pattern, Simplicity 5520 with a few modifications.

  As you can see, the hat didn't fit my son's large head so I had to make an additional strap in the front with some elastic in it.  You can't really see it in these pictures but the gray has a shine that makes it look like chain mail.  
  I also didn't like the insignia that came with the pattern so I picked my own to use as the template.  (The pattern has some funky Dragon/Frankenstein thing!)
 I think we might have to save the gold boots for next year and make him into someone from the 70's OR into Richard Simmons!  Maybe use the gold belt as his head band!  hehe
As well as this one turned out, I don't think I can ever surpass last years costume!  

July 28, 2010

Hooded Towel

The other day I reorganized my craft spot and came across several projects that I had all of the supplies for but I hadn't started yet.  This motivated me to kick it into gear and de-craft my craft room.  One of the first projects I tackled was the hooded towel for my son.   I know, I'm probably the last person in blogland to actually make my own hooded towel but here it is anyways!
My son doesn't have a career in modeling in his future.  I think I took over 20 different photos and this was the best I could do!

This is the entire towel from the backside.  I made a cut little dimple in the back.  Ignore the toe! 
Close up of the dimple in the back.

This was taken from the inside of the towel.  


 I used a tutorial that had a lining so I could hide the seams.  I just used the other half of the hand towel for the lining.

The cutest part.....look at those ears!

I used several different tutorials to help come up with my own version.
Little Birdie Secrets (Basic Hooded Towel)
Infarrantly Creative (Dimple in the back of the towel)
Break It Down Sewing & Design (Lining/Seamless)
Oopsey Daisy (Ears)

July 7, 2010

Infant Hair Bows & Headbands

About three months ago I welcomed a new niece into my family.  Of course, I had to make her some bows since I just have a little boy and I've never taken the opportunity to learn how to make bows.  My sister-in-law is not into big flashy pink bows that cover most of the babies head so I had to be creative and do a lot of internet searching to come up with the perfect simple bow for her.  
I followed the basic how-to of small bow making but then played with different versions to make them unique.  
Some of the ribbon I found at fabric & craft stores or at Walmart but I got most of my ribbon off of Ebay.  I was able to get a wide variety of colors and design and quantity within my budget.  I now have so much ribbon that I'm constantly looking for projects to use it with.  I even tied some in my hair for the 4th of July!
Some of the bows I matched with specific outfits that my niece had.  


I tried to incorporate some buttons into the bows but I never was very happy with how they turned out.  


The most recent successful experiment was making a knot in the middle of the bow.  It added a new element to the simple bows.  
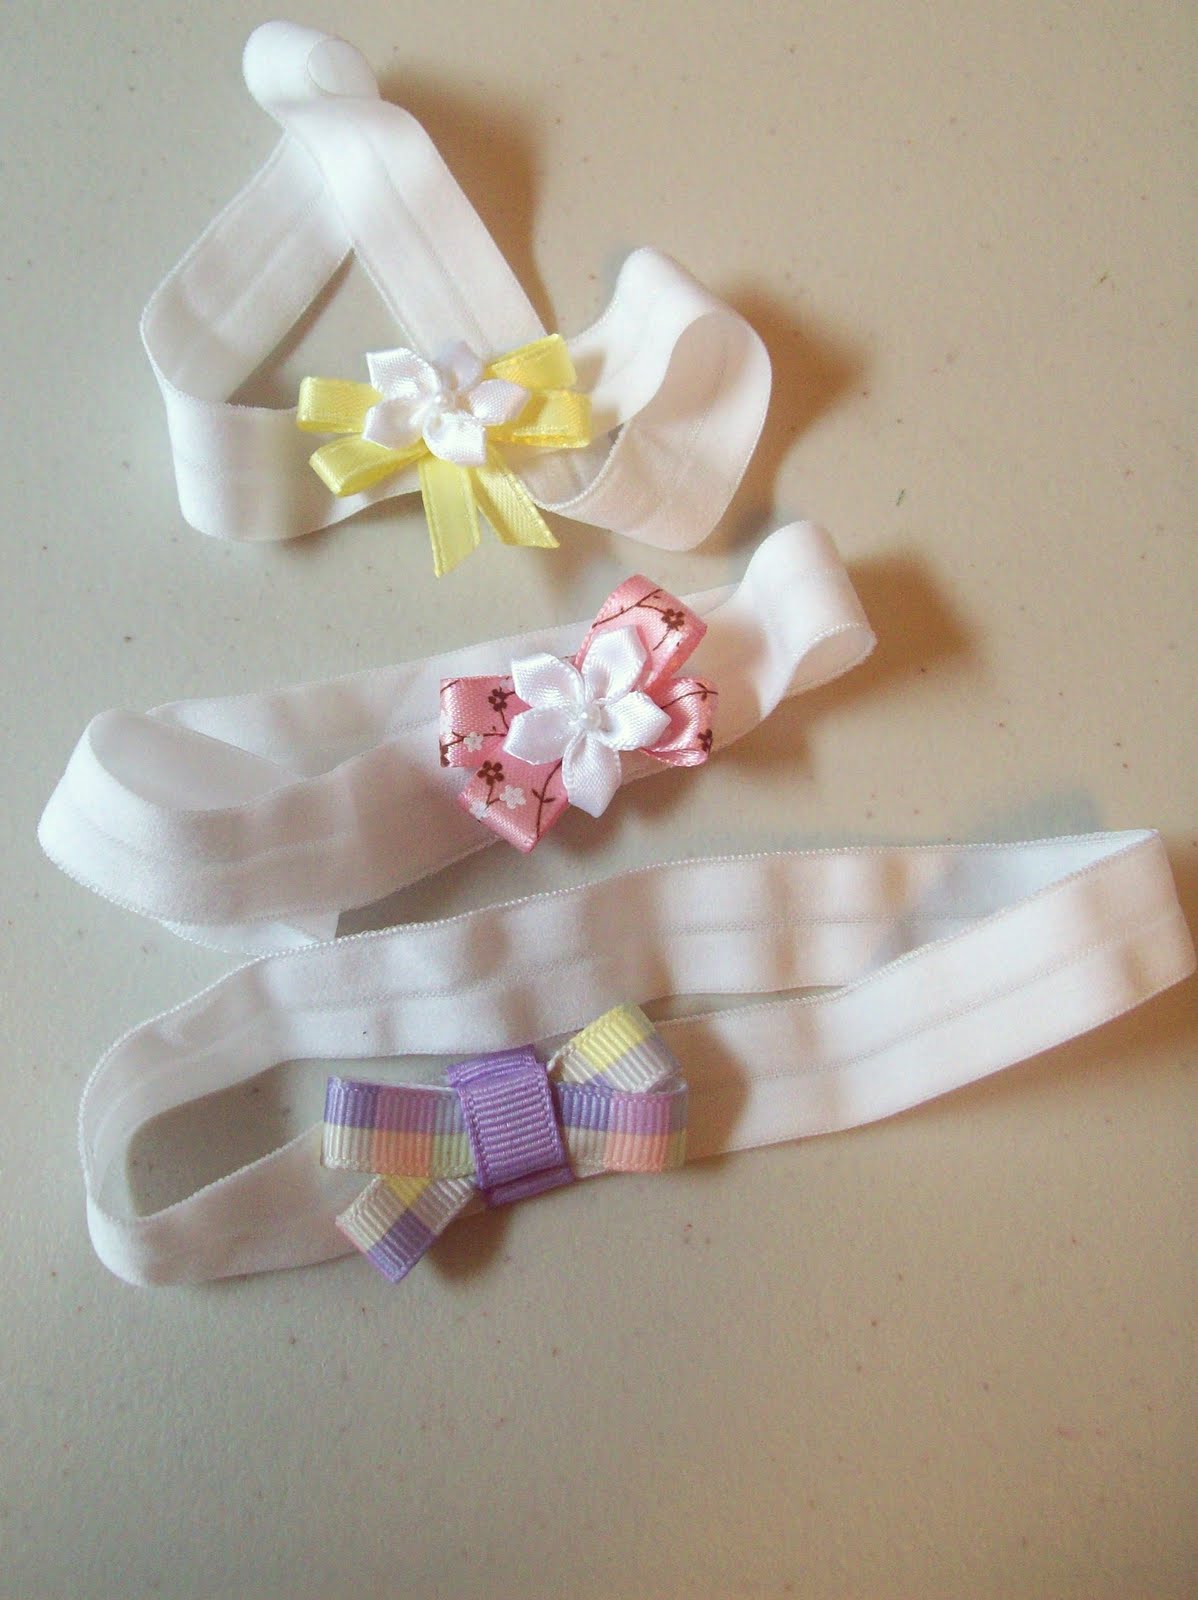
Another thing I discovered on my search was fold-over elastic.  I used it to make the headbands.  I could only find this online and got mine on ebay.  It is extremely soft and stretchy elastic that lays smoothly on the baby's head.  I just hot glued the ends together and then had ribbon wrapped around to hide the seam.  It comes in a wide variety of colors as well.
I've seen the white flowers at fabric stores near the ribbon.  I think they add a nice sophisticated touch to the bows.  
This final headband/bow is my absolute favorite.  Unfortunately, I can't take credit for it all.  
My sister-in-law bought a headband similar to this one and decided that it wouldn't be hard to duplicate.  She took two pieces of white ribbon and sewed them together on both edges.  She then put thin elastic through the openings of the ribbon and cinched up the ribbon.  I then sewed the ribbon together with both seams facing one way.  I then took one of the white flowers and carefully looped the purple ribbon around it and held it in place with hot glue over the seam edges to hide the seam.
I can see myself making several of these in the future.  Now I just need my own little girl to wear them!  

A few of the websites that I've used frequently to help make my bows are:
Posh n Pretty (Basic Bow)
Paper Seed (Basic Bow)
Girly Things (Wide Variety of Bows)
My Tiny Sweet Cheeks (How to cinch bow in the middle)
Little Millie & Me (Fold-Over Elastic)
These are just a few of the many tutorial that are out there.  If you have questions about any bows or headbands that I've done feel free to leave me a comment and I'll get back to you.